
George’s Geodesic Greenhouse project – March to June
| Project home | March to June | July & August | September & October | November & December |
Saturday, March 3, 2012
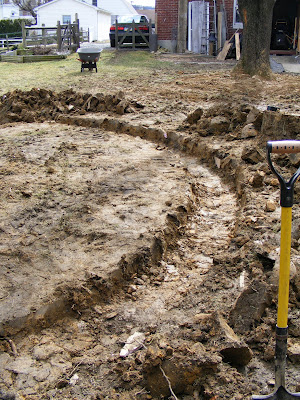
Thermal Pond Dug
After a week and a few rain showers, I was hoping the ground would flatten out a bit. It is still quite a mess! I can see now that I have a lot of hand work ahead of me to get the ground level and the base stone laid and compacted before I can lay in the block and begin construction. I like building with wood, but the site preparation is horrible! Right now it’s a slippery disaster and about 5 pounds of mud stick to each shoe. I’m thinking of hiring a neighborhood kid to help with the shoveling.
You can see at the top that I have pre-dug for my thermal mass pond on the north end. I only went down about 18 inches, but it should give me a few hundred more gallons. My goal is an 800 gallon pond with catfish, heated in winter by a solar collector and a PV powered pump and aerator. If I can help it, I won’t be running electricity out to the greenhouse. Long-term plans include a deep-cycle battery or two to keep the air pump going at night and to run a couple lights.
Sunday, March 4, 2012
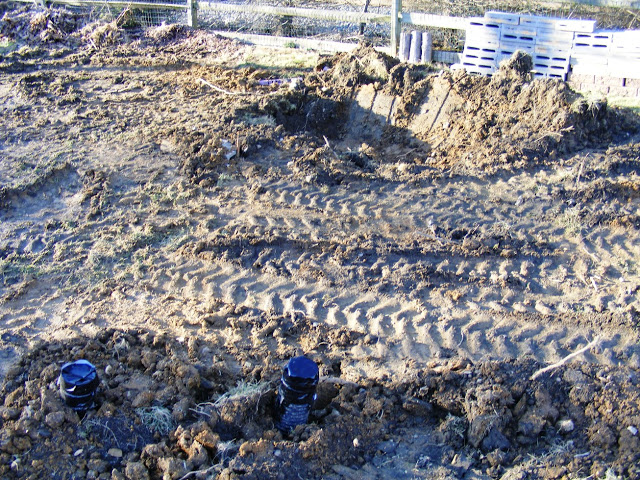
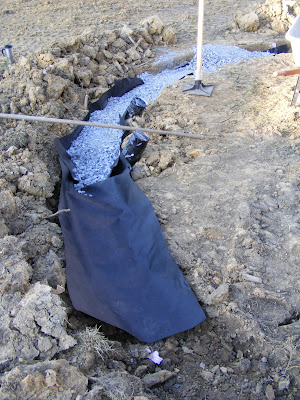
Leveling the trench
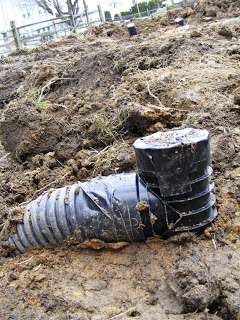
Here is the 4″ tee I found to fit the drainage tube.
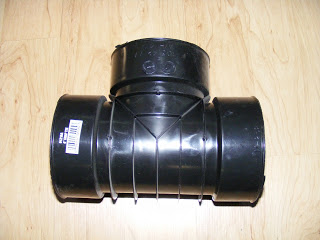
I turned it up on its end to direct the main air flow to the northwest side of the foundation, as I expect it will be colder there. I can always balance it out if I need to, but we will see how it goes. I have again taped the open end to keep out water and critters.
Here I am digging out an 18″ wide trench for the foundation stone. The trench will slope slightly toward the back of my property for drainage into the ditch. I plan to catch most of the water that falls on the greenhouse, but I expect there will be yard runoff.
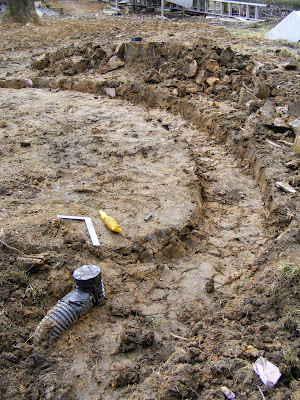
Next, I plan to line the trench with landscape fabric, then 4″ of stone and the blocks for the base. Another weekend and almost ready to build!
Saturday, March 10, 2012
Stone and Block Foundation
Almost ready to build! First I laid 24″ wide strips of landscape fabric into the trenches (this will keep the stone from sinking into the mud and therefore requires less stone) then poured in 4″ of stone.
I compacted and leveled the stone base, then came the slow, careful work. I used my radius line with a line level, a small level, small rubber mallet and a hand tamper.
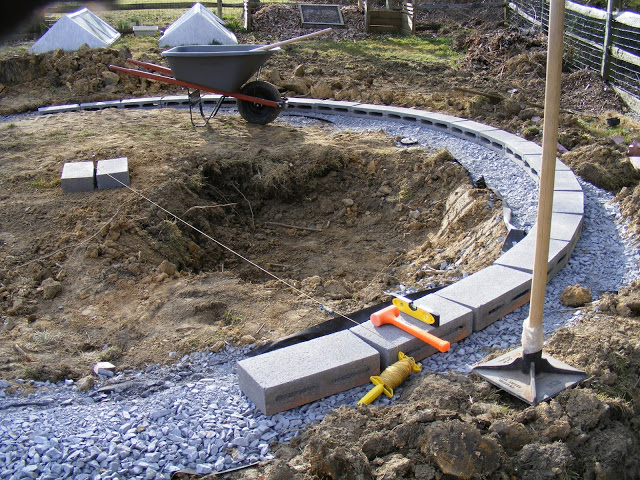
I really had no idea how far I would get with 3 yards of stone, but it turned out to be just the right amount with a half yard left over for some driveway touch-up!
I am soooo happy that the back-breaking ground work is almost over. Tomorrow I will return to my favorite occupation of woodworker/carpenter.
Sunday, March 11, 2012
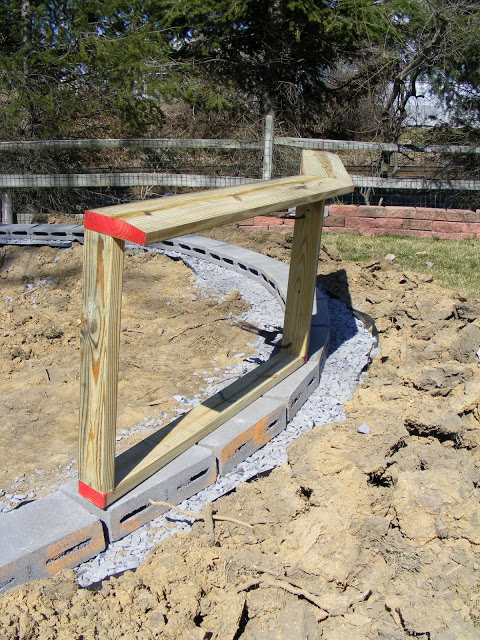
Construction Finally!!!
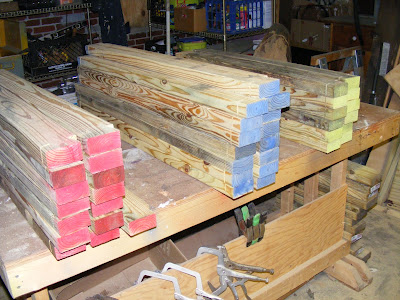
I spent an hour this morning finishing the foundation, then got straight to cutting out the wall frame. I put my radial arm saw to work cutting the angles at 12 degrees.
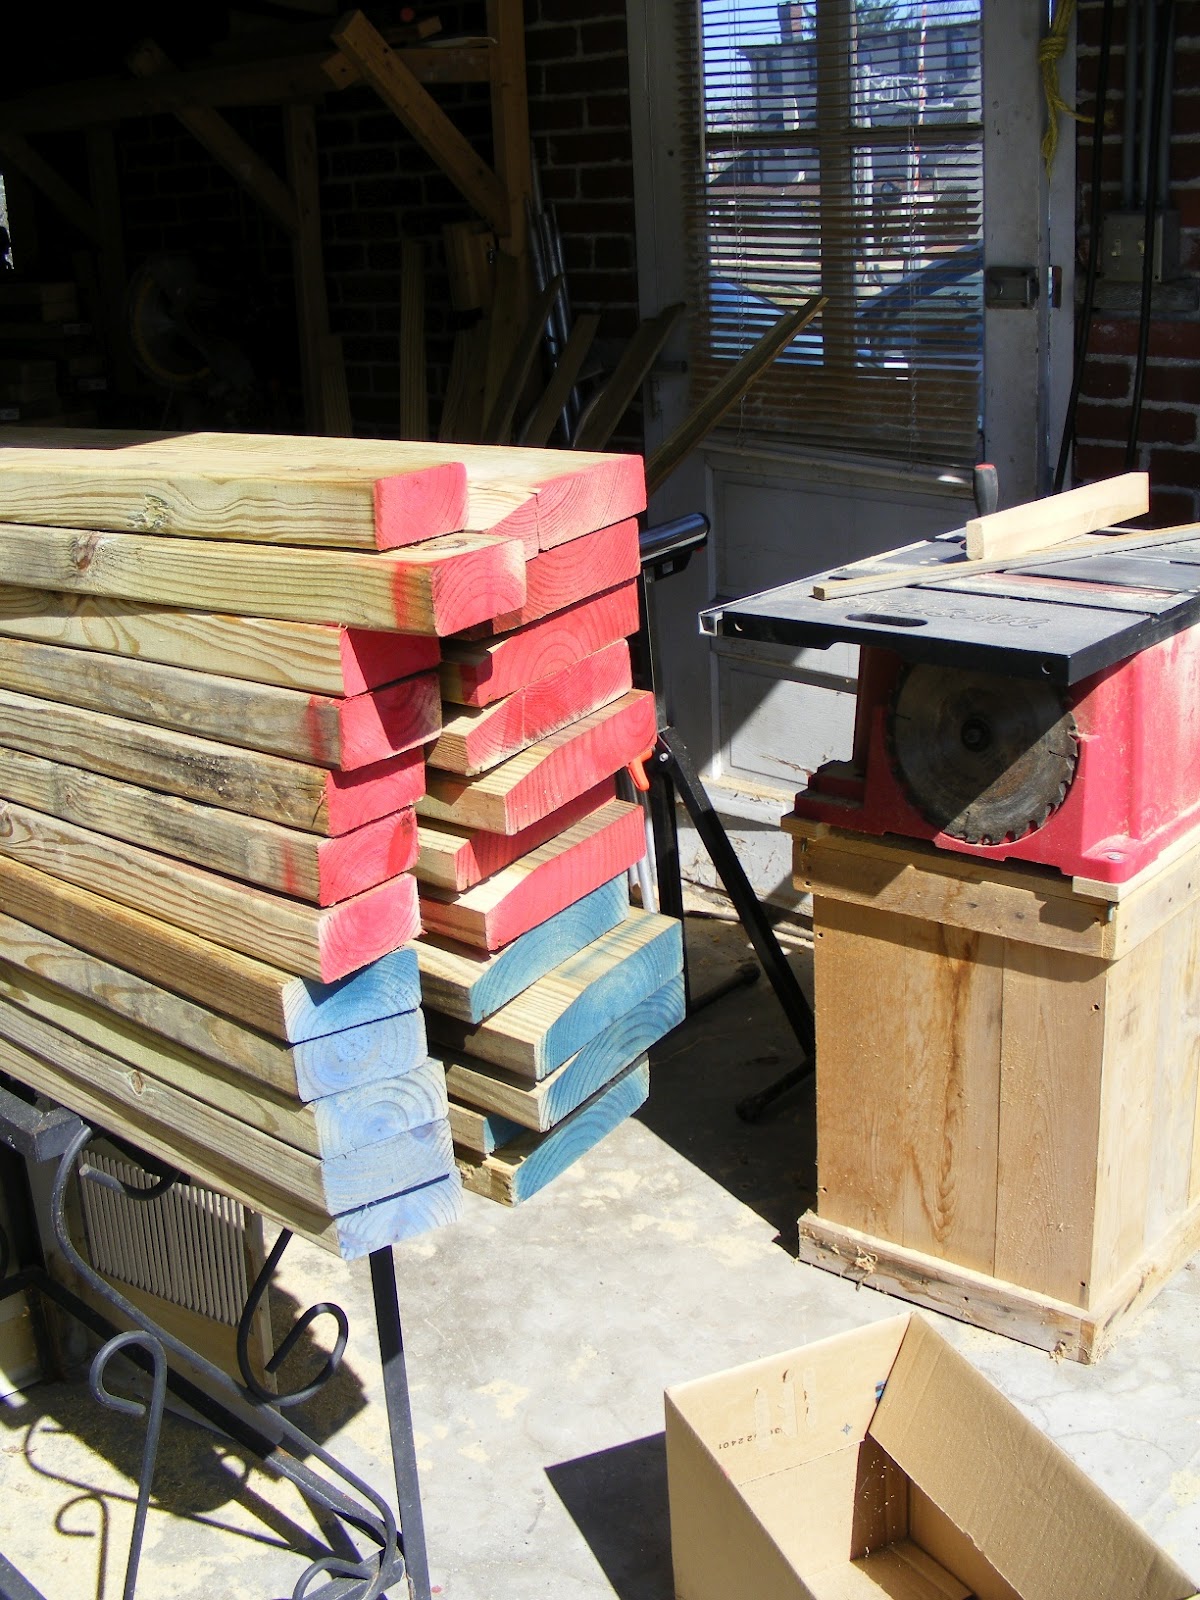
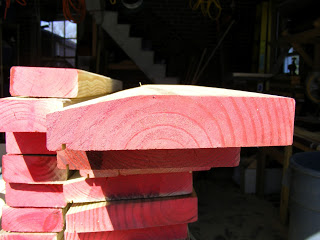
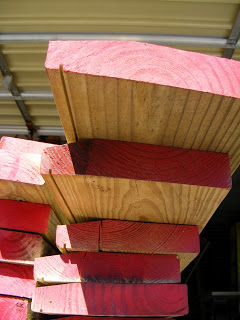
I am painting the ends of each piece so I don’t confuse the 3 lengths that will be used, since they are only different by a couple of inches. Red is for the longest “C” struts, blue for the “B” struts, and the shortest “A” pieces will be yellow.
I am using 2x8s for the top sill. The first course of glazing will rest on top. I have cut a bevel and drip groove to help direct water into my rain collection system.
Saturday, March 17, 2012
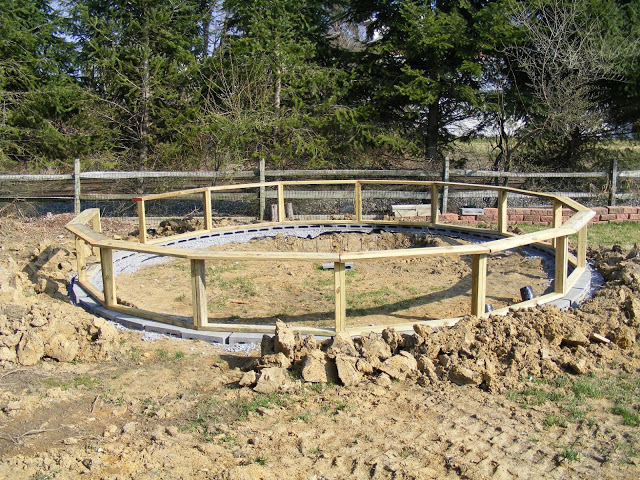
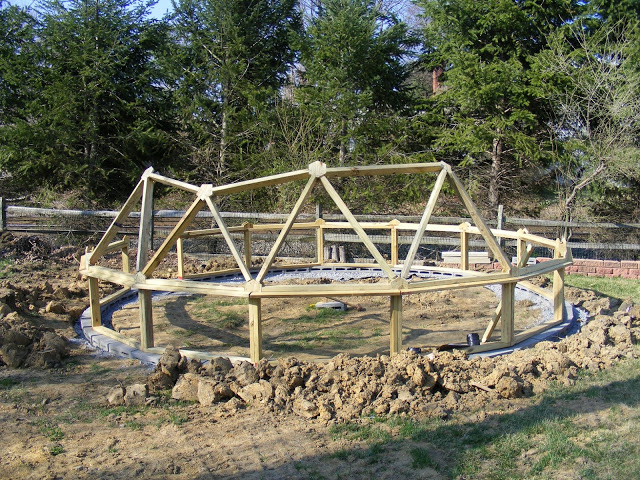
2-Foot Wall and Sill
The wall frame is up. I can start to see the end now. I can stand inside the circle and feel the size and picture how it will look. I’m really excited.
Tomorrow will be another tedious day of cutting the connectors and struts. All the complex angles make me wish I had more saws! I have some plans to mass cut what I can.
Sunday, March 18, 2012
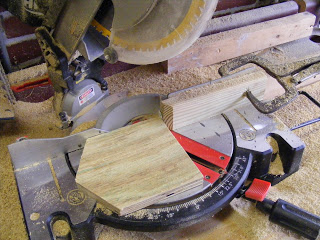
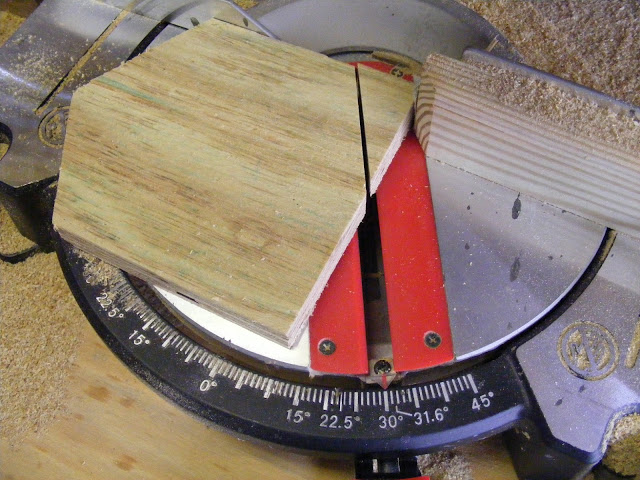
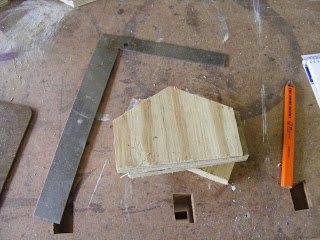
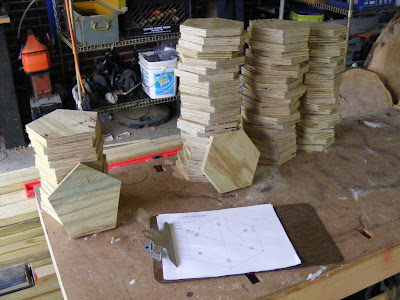
Cutting of Hubs and Struts, Dome Assembly
Wow that was a ton of cutting! The strut hub connectors went pretty quickly, just by cutting out rectangles and doing the angles with a miter saw. I decided to go with pentagons and hexagons with a 3.5″ radius.
The angles of a pentagon are 108 degrees, or 18 from the flat side on the saw. The angle of the cuts for the hexagon is 30 degrees.
To draw a pentagon, you need to be handy with a compass, but you can do a quick Internet search to see how it works.
I just set all the pieces up of the left and a trash can on the right and got into a rhythm. It’s important to keep concentrating, and stop for a break when you get tired. All my injuries and close calls were the result of being tired and impatient.
I ripped down the six-way connectors to make the four-way connectors.

And here is the exciting part! Building with geodesics. I can tell already this is going to be tricky, especially doing it alone. Two people wouldn’t have enough hands to hold, clamp, adjust and fasten.
Monday, March 19, 2012
Going Up Quickly Now
I had some trouble in the beginning getting the struts to line up right, then I realized that you have to push or pull on each hub section pretty hard. It also helps to have some pretty strong quick grip clamps, not the Harbor Freight model. Since the angle cuts aren’t perfect, I don’t think they will ever fit together like a jigsaw, but a 1″ margin of error isn’t so bad.
I only cut out half of the struts. I did this on purpose in case I get close to the top and need to change some of the lengths. Hopefully I will be able to stay true and keep cutting the lengths according to plan.
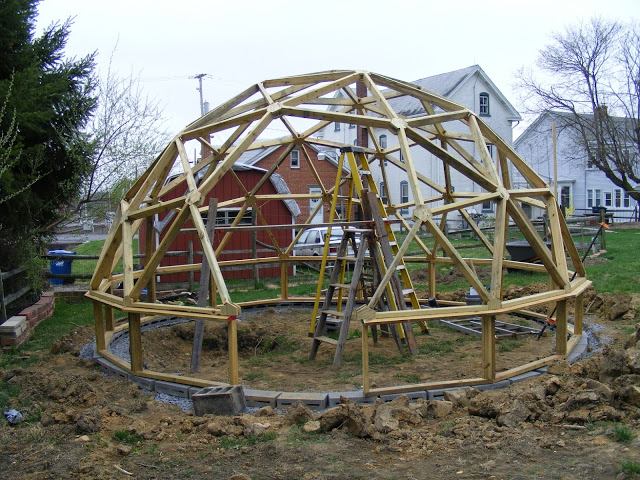
Thursday, March 22, 2012
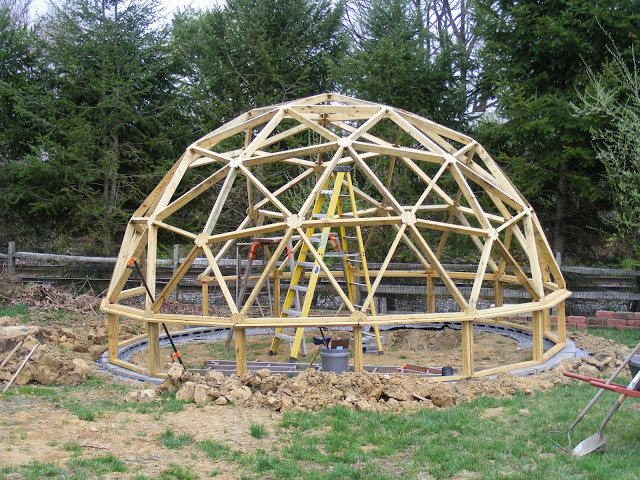
Starting to Look Like a Dome
I built what I could before I needed to cut more struts.
The best advice I can give is to make the first course of triangles fit as tight as possible. Any errors at the bottom become bigger errors as you go higher. I am considering tearing the whole thing down and fitting everything closer. We’ll see.

Here I have loaded several struts onto my saw table with a temporary stopper. I set my radial saw bevel at 12.5 degrees and used it to cut the first of many angles on each end.
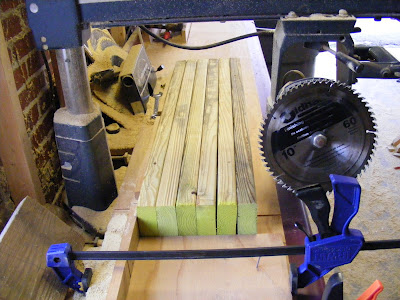
Again, painting each length makes life a lot easier.
Monday, March 26, 2012
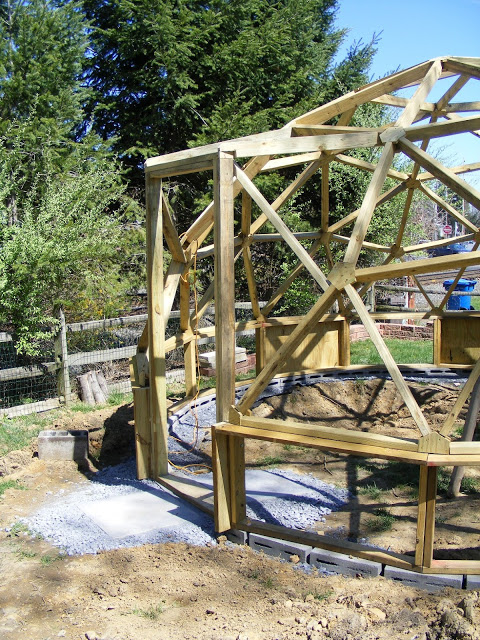
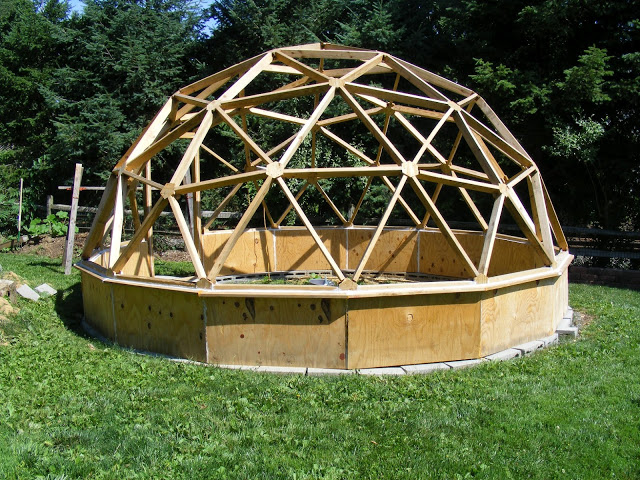
Struts Are Done!
It feels great to have completed the dome structure. My next order of business will be fitting a door, plywood on the base, and then start making vent windows for the top.
Here is the space left for the doorway. It will be a careful custom fit.
Again, in retrospect, I can’t stress enough how important it is to fit everything perfectly from the beginning. I only had to change one strut size by one inch, and I imagine everything could have fit even better had I started more carefully. Who knows, maybe not. It’s amazing how the math works though.
Tuesday, April 3, 2012
Doorway is up!
Sorry I have been out of touch for a while. I have been working slowly. Latest updates are a doorway that was challenging to set up. Now I know why everyone places the door well into the perimeter rather than at the outside wall.
After fitting the doorway, I laid some large pavers to help with the traffic.
Other than that, I have been cleaning up the job site, re-grading around the outside of the dome, and moving dirt around. I am also shaping my pond after realizing that the footprint was way too big.
Doorway
Here is the doorway. If I were to do it again, I would be sure to make the doorway in the middle of one of the “A” strut pentagons for symmetry. I would also consider building the doorway inwards rather than out, even if some space is lost. The reason I chose the hard way is because I plan to build a second inner door with a vestibule.
You can see here where I laid two 24″ pavers to help with the wheelbarrow. We’ll see if they remain permanent.
Friday, April 6, 2012
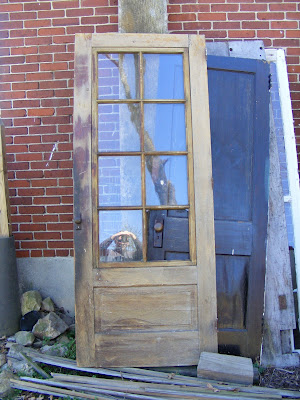
Here is a door I scavenged from a neighbor up the street. I watched a local punk kick in the glass right as I pulled up! Not hard to fix though.
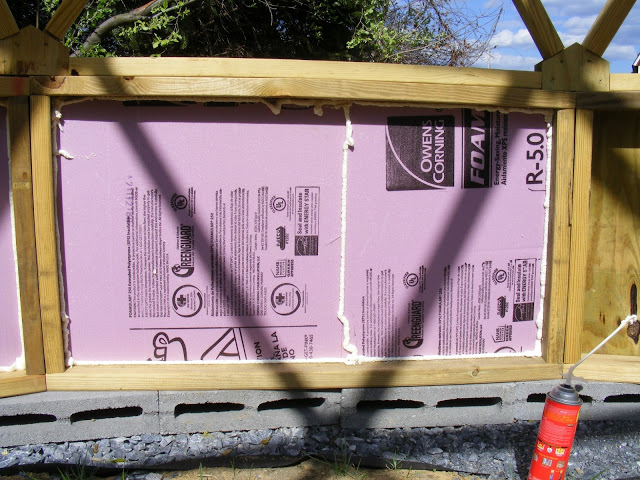
Insulating the Wall
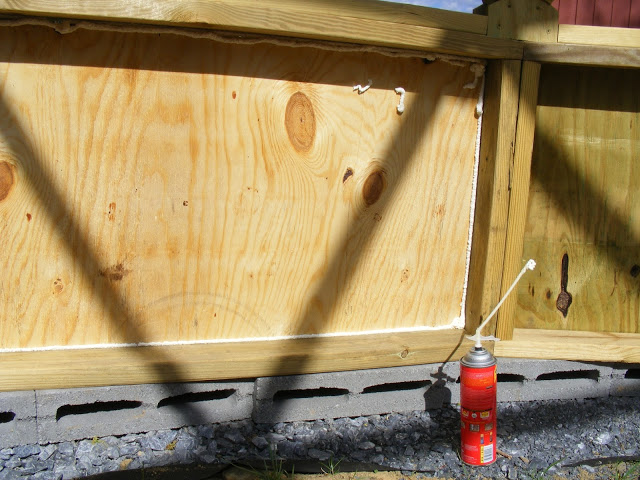
First some Great Stuff in the cracks, then leftover pink board remnants, then some more great stuff. No construction adhesive necessary!
Thursday, June 28, 2012
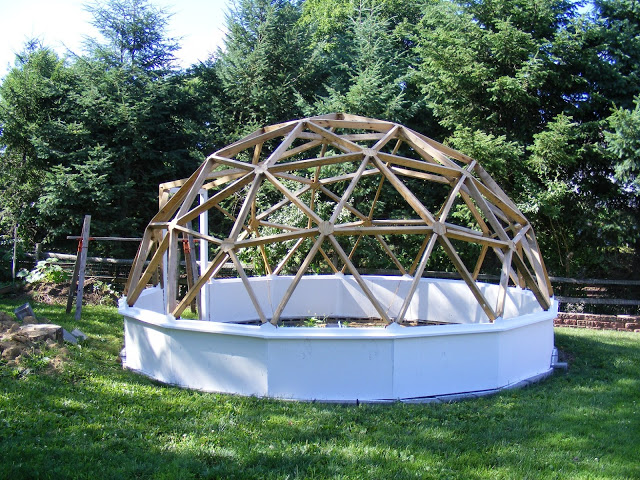
Wall insulated, caulked, painted
I know it’s been a while since my last post. I have a lot of projects that require my time and resources! I have been working slowly though. The base wall has been filled with pink board, edges sealed with expanding foam and caulk, then painted.
Here is the wall finished and seams caulked:
And here it is painted with white barn and fence paint:
| Project home | March to June | July & August | September & October | November & December |

