
Bamboo
 |
 |
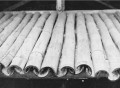 |
Bamboo is a highly versatile and inexpensive material which lends itself very well to dome and shelter construction. See below an example of the construction of a 10 meter (or 30-foot) geodesic dome submitted by Jorge:
|
GEODÉSICA DE BAMBU 3V COM 10M DE DIÂMETRO

|
What follows below is a transcript of page 95 of Domebook 2 describing how to build a bamboo dome. If you want a PDF version of the page click here. The following is the HTML version of the page.
You can also view the design and construction of two bamboo structures:

Bamboo grows fast, is free material for a dome framework. It might be possible to suspend a tent skin or mosquito netting inside or pull a stretch cloth over the outside and shoot foam. Tools: a pocket knife and string. The following instructions were prepared by R. Buckminster Fuller. I haven’t tried this yet.
Dome Assembly
The geodesic dome, as shown in the assembly diagrams, contains two different joints: a “B” joint which occurs at the vertices of all pentagons formed, and an “R” joint which occurs at all other points.
The spans from joint to joint are BB, BR, or RR. The arc factors of these lengths are:
BB=.26030616, BR=.31030984, RR=.32636688.
For these factors, the radius of the dome is 1.00. To construct a 22′ dome (11′ radius) the lengths of the arcs would be as follows: BB=2.86′, BR=3.41′, RR=3.59′.
Cutting and Measuring the Members
Cutting, Measuring the members
There are only two different lengths of members used in the erection.

For a 5/8 dome, 80 “B” members and 90 “R” members are required.
A line of color can be drawn around the bamboo members at each measuring point. Use blue for the “B” points and use red for the “R” points.
Cross Assembly
 |
|
| The “B” cross consists of two “B” members whose lengths are: 1/2BB plus 1/2BR plus 12″ extra at each end. | The “R” cross consists of two “R” members whose lengths are: 1/2BR plus 1/2RR plus 12″ extra at each end. |
With 12″ extra on the end of each stick, there’ll be a 24″ overlap when the crosses are assembled.
Cross Tying

Place members at right angles to each other and tie firmly, but not too tight. During assembly of the dome, the crosses will twist into proper position as shown.
In all cases, when looking at a cross with the acute angles at the sides and the obtuse angles at the top and bottom, the member going from the upper right hand corner to the lower left hand corner always passes over the other member.
Stage 1 Assembly
The first stage in the assembly of the dome is the construction of the pentagon at the top of the dome. This process employs 5 “B” crosses.
 |
 |
 |
| Step A: Tie together two “B” crosses as shown in in the diagram. Note that the end measuring points have the same designation as the cross to which they are connected. | Step B: Add two more “B” crosses in the same manner as shown in step A. | Step C: Add fifth “B” cross between the untied legs. In order to insert this cross, all crosses will be twisted so that a regular pentagon is formed. |
Stage 2 Assembly
The second stage consists of closing the five triangles around the pentagon. Use five “R” crosses.

Again, the end measuring points always have the same designation as the cross to which they are connected.
At this point, the structure will tend to bow. Turn the figure so that it is concave downward.
Prop It
Lift the assembled figure off the ground to facilitate the addition of new crosses. Use five bi-ped props. Each prop consists of two bamboo sticks about seven feet long, tied together near the top with a cord about a foot long. These props will then support the dome at equidistant points from it’s apex; first at the five vertices at the top of the pentagon, later at five corresponding points on the top five hexagons. (See image of bi-ped prop below)
Stage 3, 4

For third stage use ten “R” crosses as shown. The rest of the diagrams, the “B” crosses will be shown by a heavy line, the “R” crosses by a light line, and all newly added crosses by a double line.
The fourth stage uses 5 “B” crosses which close the five hexagons.
Stage 5

The fifth stage uses ten B crosses to close ten triangles. Six of these crosses can be seen in the elevation (diagram) above.
Stage 6

The sixth stage uses ten “B” crosses and ten “R” crosses to complete the first horizontal band. We now have a 3/8 dome.
Stage 7,8

To complete the 5/8 dome requires two stages. The seventh stage uses ten “R” crosses and the eighth stage uses ten “R” crosses and ten “B” crosses.
On the last twenty crosses, all members pointing towards the ground should be cut off 12″ from the cross’ central point.

