
Build a yurt model
This yurt model project is for individuals as well as children of all ages. Using simple and inexpensive items you will understand more clearly what a yurt really is. This project can also be a preliminary step prior to building or buying a full-sized yurt. But in the end building this yurt is to have some fun!
What you will need to build your yurt model
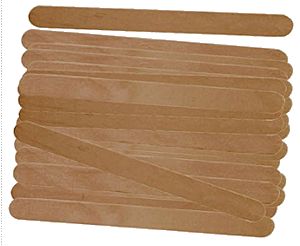 |
Popsicle sticks are useful, inexpensive, and can be used for multiple projects. In making the yurt model we used 180. We suggest that you obtain at least 300. |
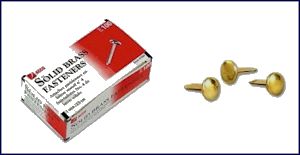 |
Paper brads are used to assemble the lattice “studs” together. 1/2″ length will be enough for a thickness of 2 popsicle sticks. a 3/4″ length is needed for thicknesses of 3 or 4 stick. |
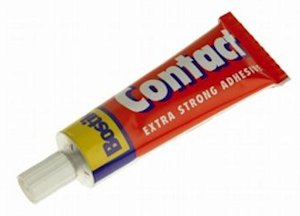 |
To get the correct length for each lattice “stud” you will need contact glue or any other kind that dries quickly. |
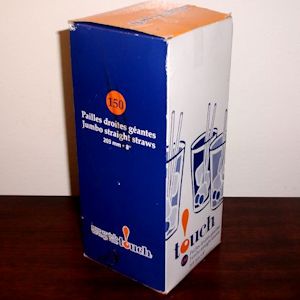 |
Drinking straws (preferably jumbo size) will be used for the roof frame (or ). You will need 5 straws per. In this project we will need a box 150 |
 |
Garbage twist ties will be very useful when you tie the drinking straw frame (or ) to the lattice. You require one twist tie for each rafter. |
 |
A small portable drill will be needed to make holes in each lattice “stud”. Each piece will require 5 holes. The drill bit should be 1/4″ wide, large enough for the paper brad to be inserted into the hole. |
Learning basic yurt terms
- The wall of the yurt is referred to as the Khana
- The individual pieces that make up the wall are the lattice (here we will refer to them as studs)
- The ribs that make up the roof are known as rafters

For this yurt model we will not require tension bands or a roof ring (crown).
Step 1: making the lattice
The instructions for this model will help you build a 30 inch (78 centimers) diameter yurt. To make a proportional structure and since regular popsicle sticks are 4.5″ (11.4cm) long, we’ll need to glue 3 sticks together to make a single “stud”. We will need to mark 56 studs as shown below.
We used an overlap of 1 inch. To speed up the marking process we lined up many sticks at a time.


Next we use glue and position the sticks as shown above and let dry.
Step 2: drilling holes
The good news is that the holes on each lattice stud are made at the same position. The less than good news is how many you will need to make (56 of them).
Each stud will require 5 holes; we are using 56 studs, meaning you will require 5 X 56 = 280 holes. It seems like a lot and it is, though you actually drilling through thin wood goes quickly.
Figuring where to drill
Knowing where to make holes in each section is straightforward; first you decide how much length you want for the ends. We chose to drill a hole 1 1/4 inch (3 centimeters) from the tip. Then we split the space in between those 2 points into 4 like so:
Whatever length you use, you will have a lattice that opens up and closes properly by following the steps above.
Since this is a model, use a drill bit larger than the brad; this will make the lattice more flexible.
Step 3: yurt lattice wall assembly
This part is actually fun because the more studs you assemble, the more your wall looks like an accordeon that you can stretch and retract. Thick of it as a miniature baby gate.
IMPORTANT NOTE: you need to be consistent when assembling the lattice. Look at the image above: the ones pointing left are always on top. What is important to do is always keep the same order of assembly for each layer of the lattice.
Step 4: roof assembly
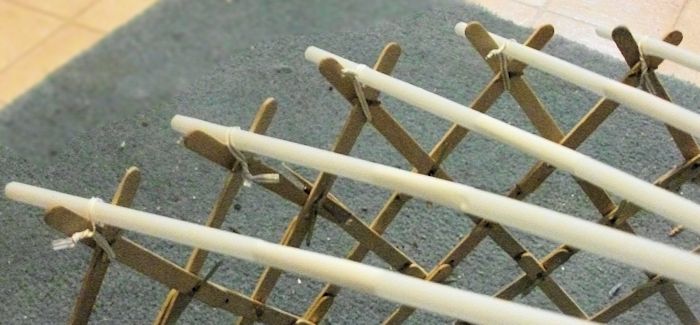
Assembly of the roof section is simple: make a long rafter by taking 5 drinking straws inside the another about an inch (2-3cm). We suggest to put some glue when inserting straws.
Our project has 28 “X” or crossed studs on the top and bottom of the wall. This means you need 28 rafters and 5 straws per rafter should be enough. If you make a larger yurt you can always add another straw. If you make a smaller yurt model you can always cut the straws to desired length.
It is almost certain you assembled straws will be slightly of different lengths. Fix this by putting them all together standing up and trim the top.
Now you need to find the center of the straw rafter by folding it in half and marking that position. To do this for all rafters just stand up all the other rafters and use a marker to dot the half-way mark on each rafter.
Once each rafter has the center of its length identified, use a hole punch such as the one below and pierce through the straw.
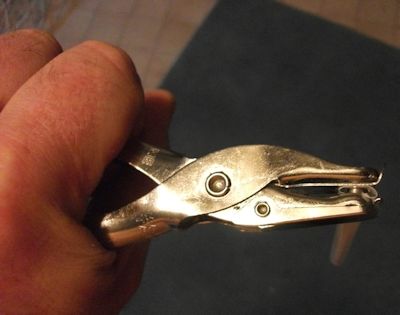
Once all your rafters have a hole in the middle it is time to assemble them all together. All you need to do is use a 1″ paper brad and insert it into each straw hole. Below shows how
Step 5: fixing the roof rafters to the lattice wall
Garbage ties are used to wrap around the straw and where two studs intersect at the top.
Do not twist the ties too tightly: decide on how wide you want your model yurt to be and how steep you want your roof to be. In other words, you need to play with your model to give it the look you want because roof pitch (inclination) depends on yurt diameter.


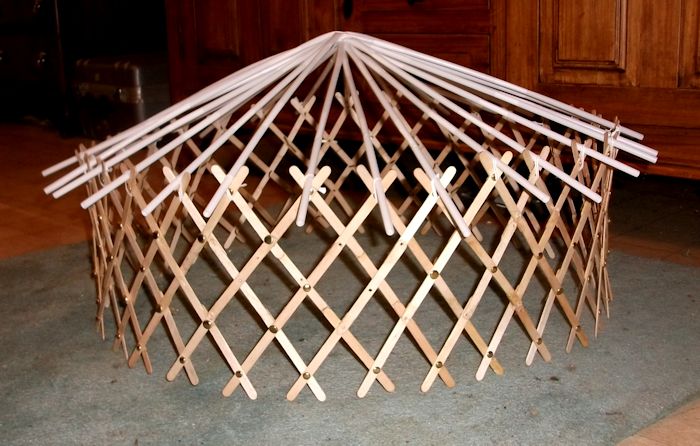
Here is an image after the yurt roof has been attached to the lattice wall
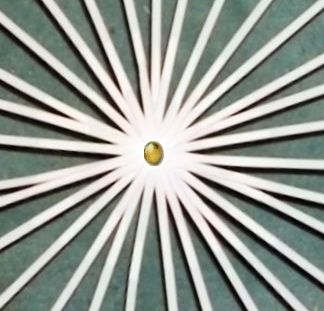
And here is a view from the top:

Step 6: adding interior wall
The best material for the yurt model’s interior wall is standard cardboard (bristol board). Once you have chosen the permanent size of the yurt, you will then have the correct height and length for the interior wall.


To affix the wall so it does not move, unfold a few brad tips and pierce through the cardboard, then fold the tips once again.
Step 7: covering the roof
Look at the image below; the first cardboard piece was positioned to cover as much of the rafter and held into place by poking a hole and slipped into the brad which holds all the straw rafter into place:

Because it’s not too thick you can cover approximately 1/3 of the roof area. Many may want to simply use 4 sheets and cover the surface with 4 pieces
The second piece of cardboard is also positioned to cover as much as possible and again held into place by the brad holding the straw rafters:

After setting the second piece you should fasten both sections with glue where they overlap, and staples on the exterior edge to keep them from moving. Cut around the roof while avoiding to cut the straw rafters. You can also flip the model upside down by being very careful.
So now you have a white roof for your yurt model, a bland, boring, pale roof. Luckily you can change the look by using inexpensive felt or any other fabric on top of the cardboard roof. You may even want to paint the roof. You decide, and make sure you enjoy yourself!
Step 8: add doors and windows
Some may wonder why we leave doors and windows for last… Two reasons:
- Until you see the completed yurt you may change your choice in the number of windows and doors.
- It is easier to work in modifying the yurt when it is reinforced with the roof and interior wall installed.
Since we use pospsicle sticks, a bread knife or a simple saw can be used to cut out the door or window section. We suggest to use the existing brads to anchor your window or door, then cut out the shape

