Straw Bale Dome
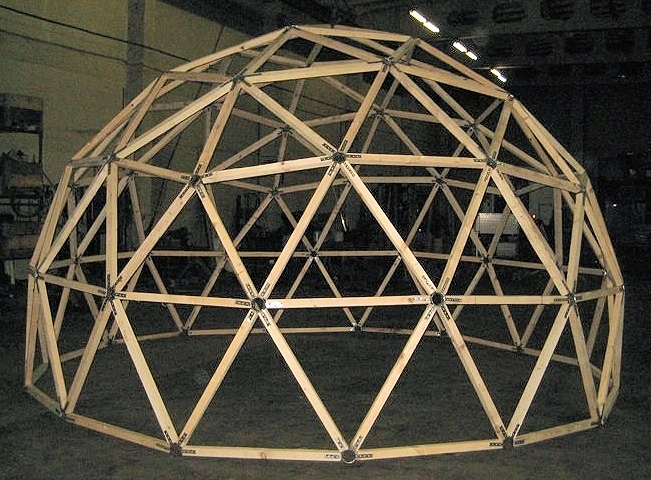
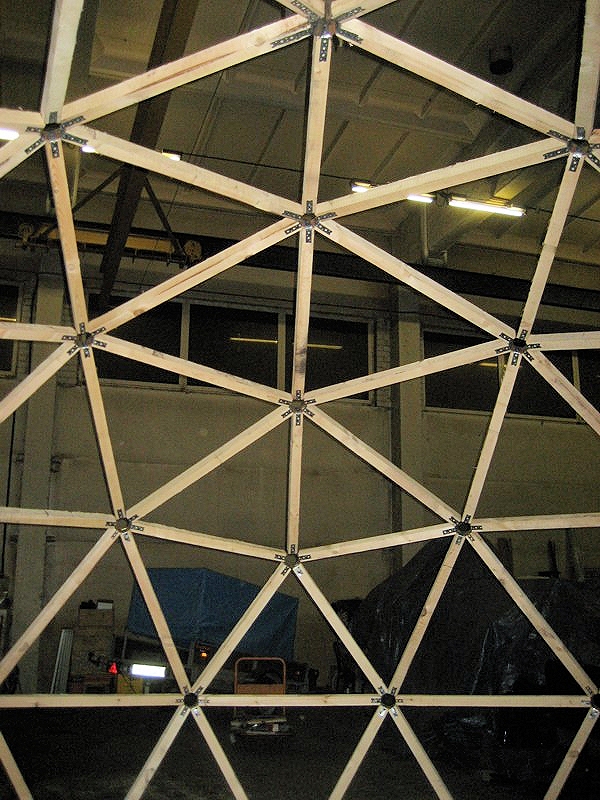
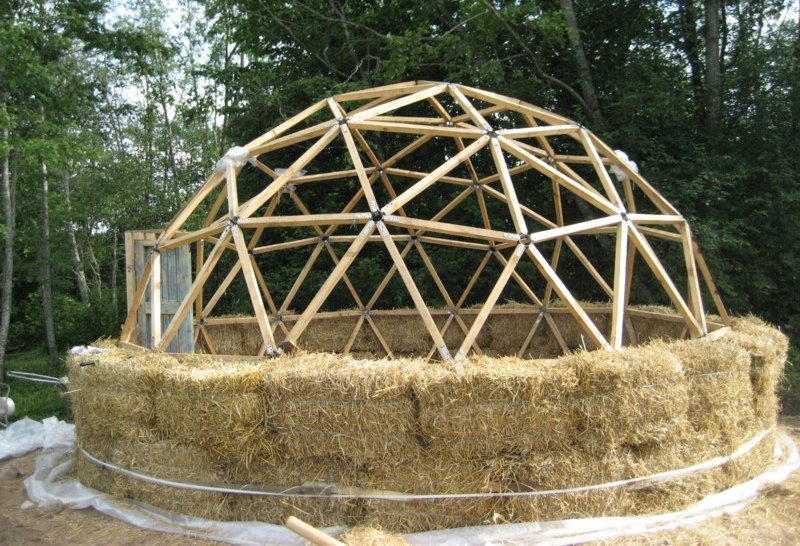
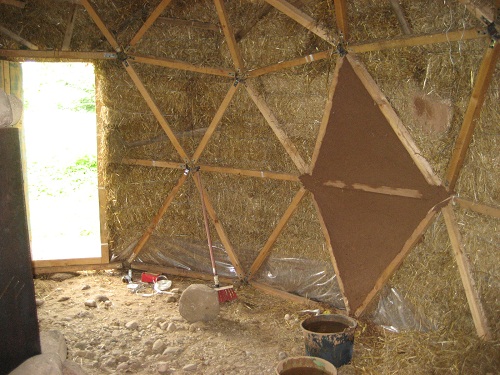
There are many web sites online with geodesic dome how-to’s, diagrams and calculators. You simply get some wood bars, cut them to appropriate length and connect them together according to a diagram. The structure is very rigid and strong. A moderate V3 6m (19ft) diameter dome can be assembled by 3 persons in about 2 hours, depending on the strut connector type. Here is our small test house geodesic dome skeleton:
We decided to combine the geodesic dome structure with the straw bale home idea. Using straw bales and clay as the walls. This is very cheap, easy and energy efficient. And this small hut is supposed to be a test house so that we can learn the process and make mistakes and learn. So far we have learned so much stuff what not to do.
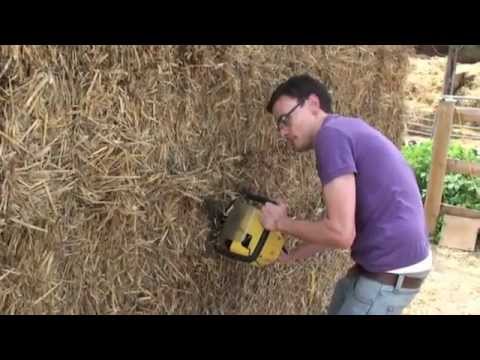
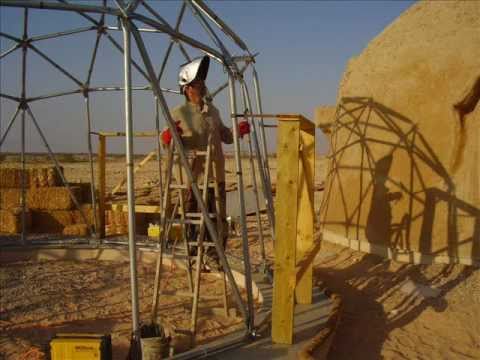
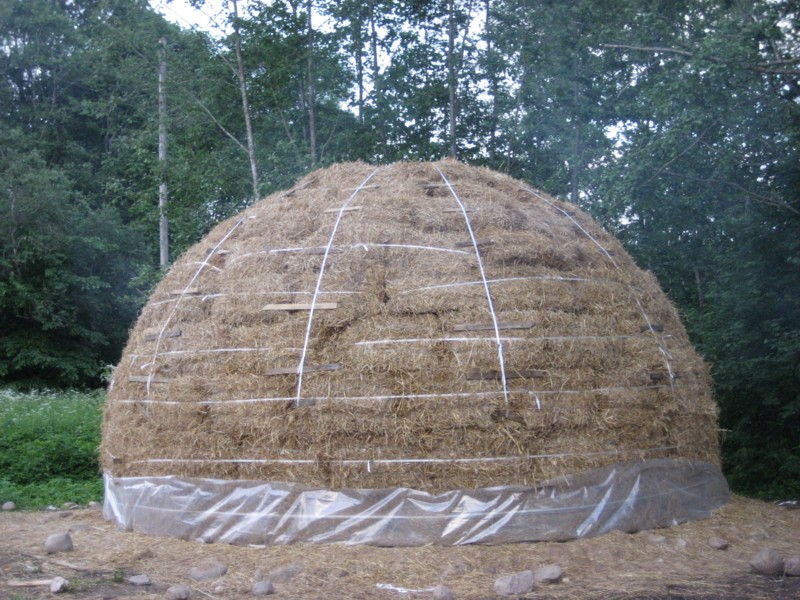
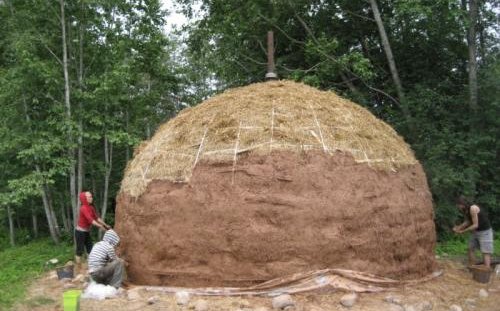
We dug out soil about 6m (19 feet) diameter and 0.5m (20 inches) deep, filled that hole with stones, gravel and sand. A perforated drain pipe was put underneath it all to drain the water out to the nearest ditch. On top of that we put the geodesic dome wooden structure with doors and began to cover that structure with straw bales:
It is not very common in our country to store straw in bales anymore, few farmers are doing this and with old and low quality machines. Most farmers roll the straw in a huge bobbins and this is also one thing in favor of insulation foam instead of hay (more on this at the end of the page). You can get straw only seasonally in autumns or summer ends, but that is already too late for starting building, you need to store the bales properly through the winter.
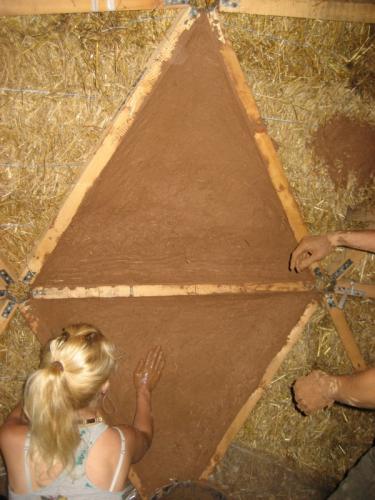
 You need to stuff all the gaps between the straw bales with straw and you are ready for the first layer of clay/straw mixture.

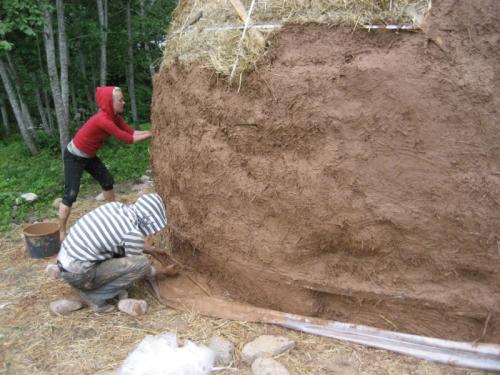
The first layer is made using very liquid mix, so that it sticks good to the straw. You can not use thick mix for the first layer – it wont stick. Only when the first layer is done, you can begin with the next one.
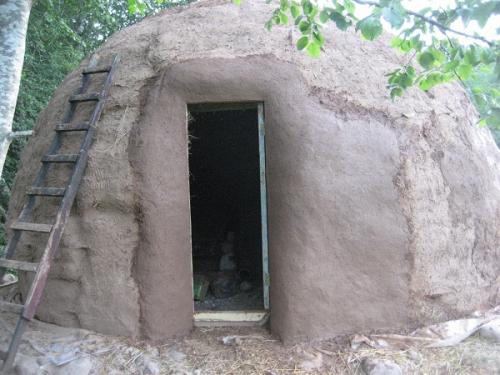
You need to do all the inside and outside clay works before you can proceed to waterproofing the inner and outer surface. There is also always a possibility of straw bales beginning to rot and other difficulties, that is why you would need to build everything as fast as you can so that straw bales have no chance to get wet. A little wetness is nothing bad, it dries fast, but prolonged wetness can cause problems.
The dome structure is very solid, it now supports around 3-4 tons of weight with all the clay and straw bales. The work is rather hard and weather dependent, if it is raining, you need to cover the dome with something to prevent water damage, if it is sunny, you need to remove the rain protecting plastic or whatever so that clay can dry better.
This is a time-consuming but fun project. We are constantly exploring ways of how to do this faster and easier. If you make a clay/water slurry sprayer, that will save you a LOT of work.
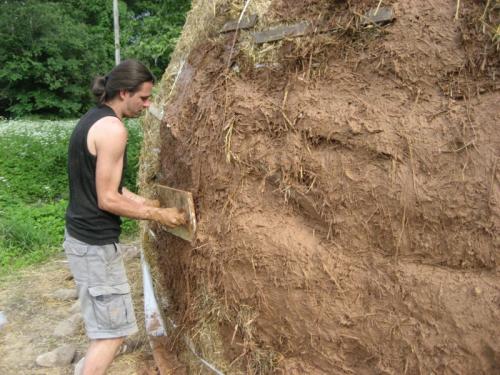
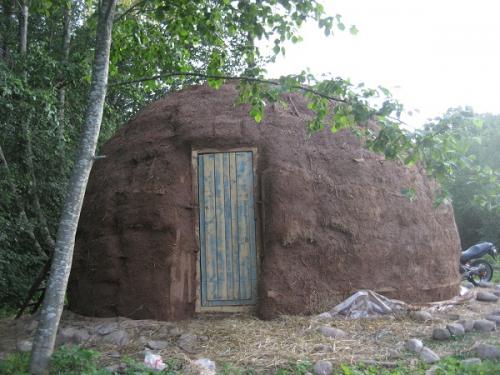
This first thin layer is needed so that the next layer will stick better. With the next layer you use much thicker mix of clay, sand and straw and fill all the deepenings, voids and cracks till the surface becomes smoother like this:
When all the layers are ready, smooth and dried, the surface is covered with linseed oil and turpentine mix in three layers. The linseed oil penetrates inside the clay up to 5mm (1/4 inch) or so and when it dries, the surface becomes very hard and waterproof. The insulation properties of such a home are great, we have a heat wave here now and sometimes the outside temperature reaches 33 degree Celsius, but inside the dome house it is nice and cool.
(Click on images to enlarge)


We have still much to do, but this is a fun project and if it will survive the winter, then we will start working on a bigger and better house. Overall this is really a cheap, easy to build and efficient house type.
A lesson learned
Anyway, we are now thinking about using polyurethane foam insulation about 70mm thick instead of the straw bales, because it saves a LOT of work, it is faster, just few hours to cover the whole structure, it is rain proof and very light material. Its insulation properties is very great, 100mm thick layer of this foam is equivalent to 1 meter of brick wall. Also nothing can rot or settle down over time. You just need to cover it with decorative coat of UV resistant paint or plaster and that is it.
The foam is very hard and firm, you almost can’t press your finger in it, much denser and firmer than straw bales. Sure, it will cost a bit more, but that is well worth because it saves you almost 70% of the work you would do otherwise. I have calculated that if I went with the foam from the beginning, I would already be done long time ago and would have saved some money, that I payed my workers.
![]() The following was in great part contributed by Jetijs, senior member on the Energetic forum.
The following was in great part contributed by Jetijs, senior member on the Energetic forum.