A Tale of Two Yurts: Yurt #2
It’s assumed that you are somewhat familiar with yurts (or you read the main yurt page on Domerama). This section shows how to build a yurt without special knowledge or tools.

This 25-foot diameter yurt with an area of close to 500 square feet was built as a way to attract attention to the local tractor dealer. This specific version required to be larger, but also to withstand strong winds, something that the region is well-known for. Therefore it was decided to make the structure stronger by making modifications to the basic yurt design and using more screws.
- Big enough to place various types of lawn and garden tractors and accessories;
- Tall enough for clearance, which lead me to use 8-foot wall studs instead of 7-foot ones;
- Use 24 roof rafters with 2″ X 4″ X 12′ lumber;
The main obstacles were:
The surface was not flat and we could not flatten it. Because the septic field for the business was located right beside where the yurt would be built, nothing could be leveled
I was supposed to get help for the initial raising of the yurt. I could have done without the help because they caused more trouble than anything else. This may seem trivial, but if you have people who know everything and others that whine for no good reason, the project is already in trouble.
Building the roof/compression ring
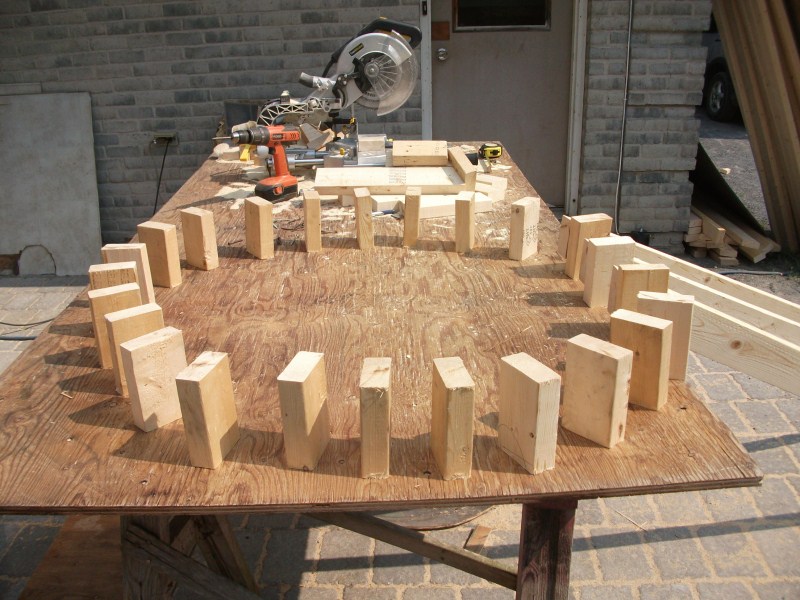
The design of my roof ring would come from one of the PDF documents on Domerama’s Yurt section. It would be made of plywood and blocks made from 2″ X 4″ lumber.
The first part was to cut the 3/4″ plywood sheet in half, then laying them one on top of each other and held together with a few screws at each corner. I marked the center of the plywood with an “X”. This would also be from where I will draw my circle.
Next I had to draw a 40″ circle on the plywood, I found a small stick, drilled a hole at one end big enough to insert a pencil or pen. From the center of this hole I marked an ” X” 20″ away. Then I took my stick, inserted a screw into the “X”, and screwed it into the plywood. The result was a measure that could rotate around my center point and draw a perfect circle on the plywood.

Since I decided to use 24 rafters, this would then mean my yurt ring would require to hold 24 pieces of lumber. I calculated that a 40-inch plywood circle would be enough for the job. Each rafter would slip into the ring and be bolted to a piece of lumber. The plans I had seen for this version stated to use 2 pieces of wood to hold each rafter, but that was not necessary, plus the ring would have to be much larger to accommodate three (3) 1.5″ width for each rafter.
The next issue was to decide on the slope of the roof because this affected both ends of the rafter pieces and the wall studs. From reading various documents I decided on 22.5 degrees. That would mean:
- One end of my wall stud would be cut at a 22.5 degree angle (24 cuts on the miter saw);
- All rafter ends would be cut at 22.5 degrees (48 cuts on the miter saw);
- The distance between plywood sheets on my roof ring would need to be at least 6″ for easy manipulation;
To simplify things, I did all my cuts at the same time. They were all the same so I only required one setup on the miter saw. The best part of using the same angle everywhere is that when you drill the holes, simply align both the wall stud and rafter, then drill a hole. Now that you have the correct location where to drill you can use these pieces as templates.

That took care of the connection for the wall and rafter studs. I still needed to drill a hole into each of my blocks inside the ring. My method was to screw just one of the blocks on the plywood
I lined up the angle of the rafter to the block and confirmed I had enough clearance. I did, almost an extra inch. I then drilled a hole through the rafter and the block, and used that pierced block as a template for all the other blocks of the ring.
NOTE: before screwing and gluing the roof ring blocks, you need to align them towards the center of the ring.
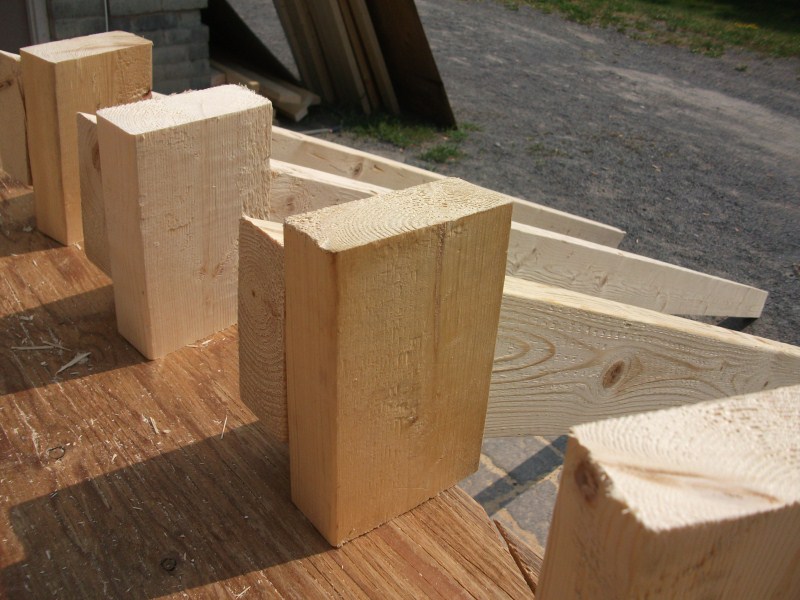
With all the blocks screwed and glued, I put the top part of the ring onto the base and screwed that part. By morning the glue would be dry and the wheel would be ready to use.
Making the lattice
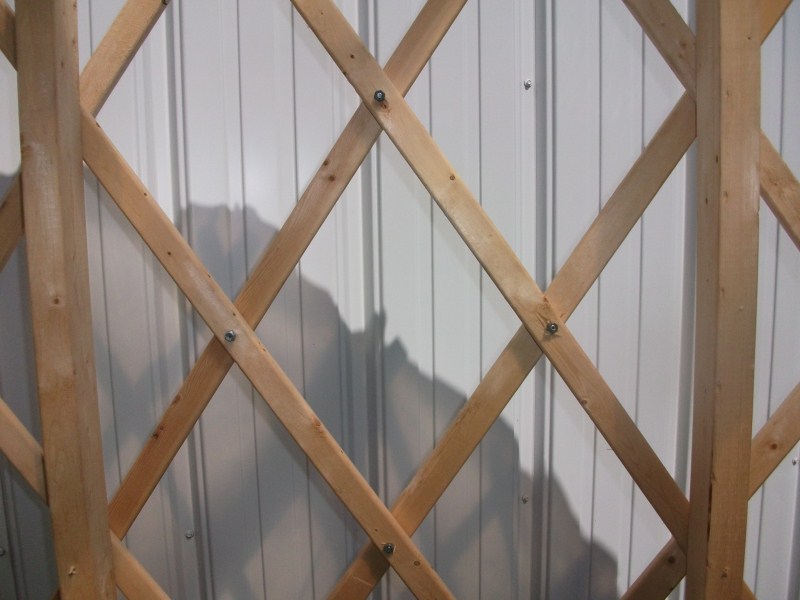
For the Khana, or lattice wall I went heavy-duty. For less than a dollar per piece, I could get a 1″ X 2″ X 8′, also known as furring. The instructions usually point to using 1/4″ thickness. I wanted a very solid wall and overall structure so1/4″ was not acceptable.
Note that this yurt is quite large and the lattice wall should be made into 3 or 4 sections for easier transport and manipulation.
Many designers or manufacturers will use aluminum rivets to hold the slats together. That is not possible when attaching two 3/4″ slats, unless I paid a lot for special size rivets. Zinc-plated bolts, nuts and washers was the simplest and least expensive solution.
My lattice wall, or Khana also had an additional 24 2″ X 4″ studs attached to the lattice with were also attached to the roof rafters
I went into a farmer’s supply store where they sell bolts, nuts and washers by the pound. This saved me at least 30% compared to the typical hardware big box store. I made sure I bought zinc-plated for corrosion protection, although stainless steel is the best, but also way too expensive.
Assembling the lattice
To assemble your lattice, you first need to drill holes into each and every slat, and you need to drill 8 holes per piece. The first hole is drilled 3 inches from the end. The following holes are drilled 12 inches apart, starting from the first hole you drilled. In my case I was using 1/4″ wider X 2 inch carriage bolts, so I made the holes a little bigger by using a 3/8″ drill bit.
Why use a carriage bolt instead of the classic 6-sided head screw? Because it has a round head, less chance to hurt anyone coming in contact with it, and it looks nicer. That’s about it!
For a 24-foot yurt, you will need approximately 72 feet of lattice, or about 140 slats, therefore 140 X 8 holes = 1120 holes. You will need the following to assemble your lattice wall, or Khana:
- 560 bolts(since 2 slats require only one bolt, it’s 1120 /2);
- 1120 washers, if you use 2 per bolt;
- 560 nuts (since 2 slats require only one bolt, it’s 1120 /2);
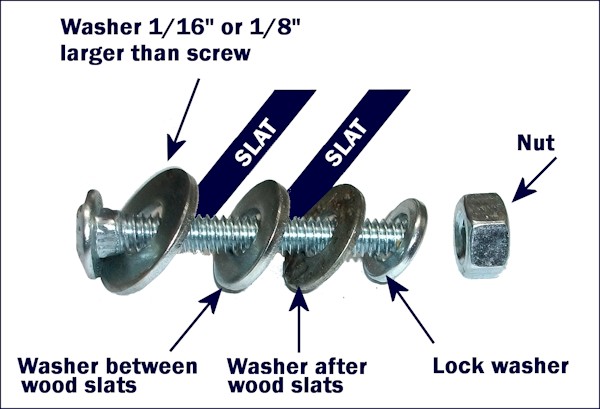
A note about washers
To avoid rot when a piece of wood touches another (a perfect example: a lattice!), insert a washer between the slats. This would make 3 washers used for each hole. Always choose zinc-plated hardware for corrosion protection, or if money is no object, stainless steel bolts, screws, washers and nuts.
You can replace the washer before the nut with a lock washer, but because pine is a soft wood, I used 3 regular washers AND a lock washer. You don’t even need washers if you want to simply screw the lattice wall permanently to the wall studs. In this build it was decided to make the structure easy to dismantle and transport.
Lastly, when using carriage bolts, there is a square under the head, used to keep the bolt in place. For this yurt I inserted a slightly larger washer that goes around that square section. Some will say it’s not necessary to use a washer under the head of the bolt, but this is soft wood, not metal or plastic, and it tends to crush; the washer is there to lessen that effect.
Recap:
- The 12-foot rafters had their ends cuts at 22.5 degrees;
- The 8-foot wall studs were cut at 22.5 degrees at one end;
- The yurt compression/roof ring was assembled;
- A Khan or lattice wall was assembled;
Is it ready to assemble? No; 2 more operations need to be completed
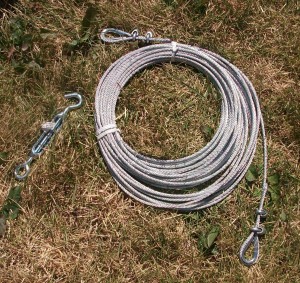
Tension band: because this yurt will have a permanent beam under the yurt ring, there is no need for one, especially with 24 wall studs. But I will still add one to the yurt for safety concerns. Because the area is known for it’s high winds, I want to have as many backups as possible. I drilled a 5/16th hole in each of the roof rafters, 12 inches from the end *where the wall is), insert a 3/16″ aircraft cable through each one of these holes and put it under tension.

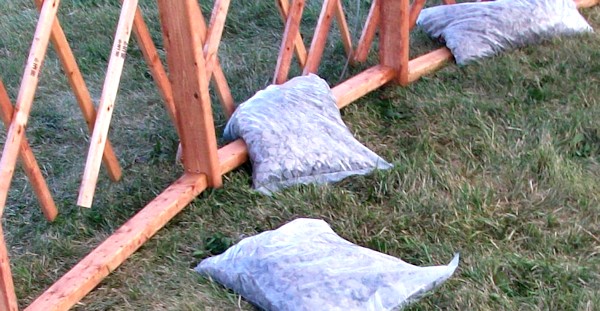
Spacers: these have a dual purpose: first, they serve to keep the correct distance between wall studs and second, they can be used to support weight such as bricks or sand bags to ensure winds or other factors do not make the yurt move. The ones for this yurt were made from 2″ X 3″ lumber
This yurt has a perimeter (or diameter) of 936 inches. If you subtract the width of the 24 wall studs (each 1.5 inches), you are left with 900 inches. 900 divided by 24 sections (between the wall studs) equals 37.5.
This means your spacers will be 37.5 inches at their longest. For a proper fit, each end of each spacer will need to be cut at a 7.5 degree angle.

First phase of the assembly
The Khana, or lattice walls were not complete, and since we started on a Friday, I needed to put up the basic frame so I could continue assembly over the weekend.
We tried to position the yurt on the most level surface, but due to its size, we realized there would be some shimming required later on. We then used a 10-foot ladder to hold up the yurt’s compression or roof ring.
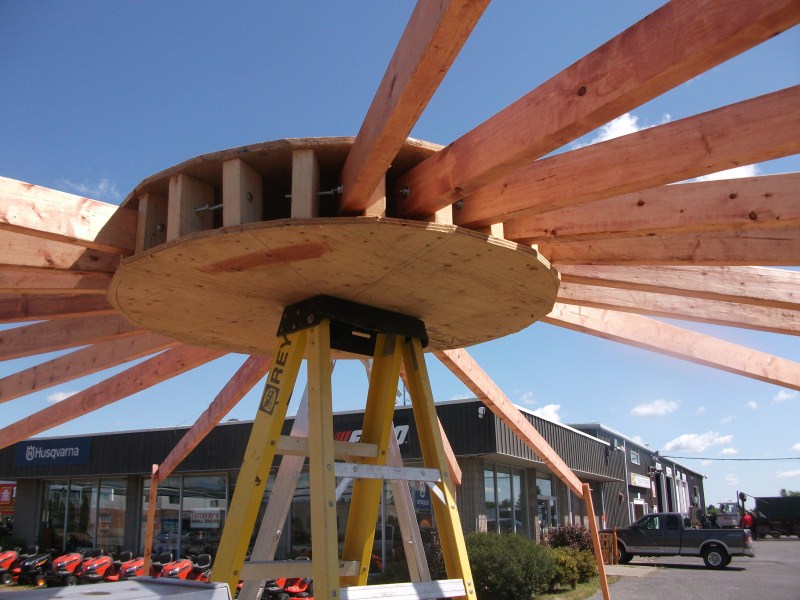
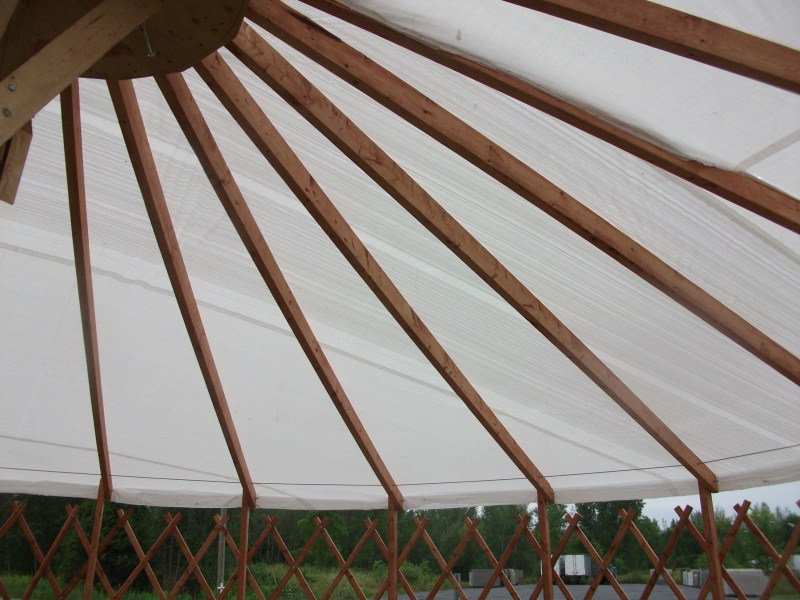
One by one we attached the rafters to the roof ring which made the structure look like a giant science-fiction spider. The structure was gaining structural strength but not enough to stand on its own. This is when I went to get the first completed section of Khana (lattice wall), about 1/3 of the total length and began to attach it to the structure. By the time the first wall section was attached the yurt was significantly stronger.
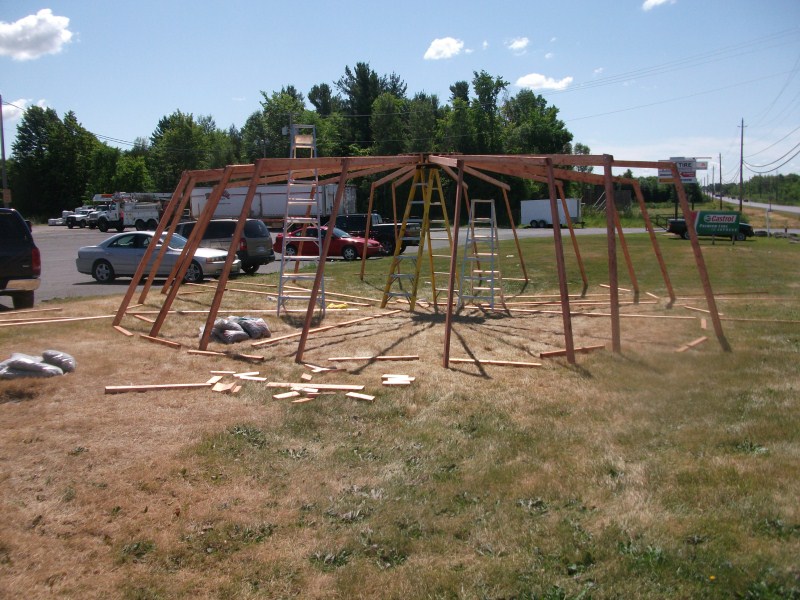
Over the weekend the focus was to continue attaching the lattice wall to the yurt.
More doors please…
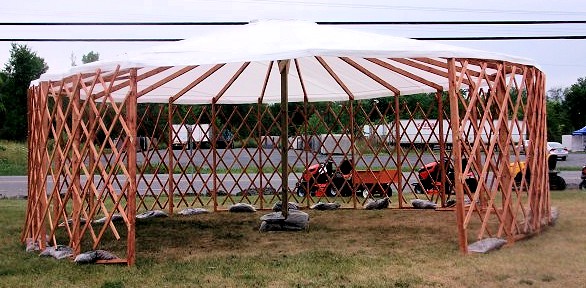
I had created a primary entrance by not attaching lattice on 2 adjoining sections, but it still did not seem to be enough. As it turned out, 2 sections around my yurt were not playing nice because of two factors:
- The ground was on a slant;
- The roof was not high enough by about 12 inches;
As much as I tried to raise the height of the roof ring it was too difficult; by now pulling up the ring meant to literally pull in all wall studs and the lattice wall in addition to pushing up 24 12-foot studs. This is where good help makes all the difference. When you are stuck with incompetent and lazy workers, you end up with this type of situation.
By making 2 additional doorways I was able to compensate for the lack of height of the roof and make the yurt fit better all around.
Weighing down the yurt
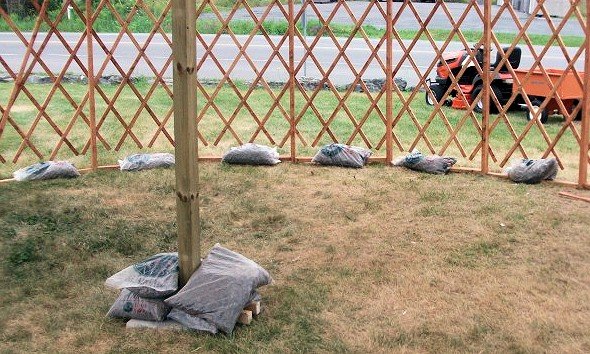
2 main methods were used: the first was to spread gravel bags all around the yurt, over the spacers between the wall studs. The second method consisted in screwing 2 pieces of wood to the yurt’s center beam and throwing four 40lb bags of gravel on top of them. Of course the bags will soon be replaced with ground screws.
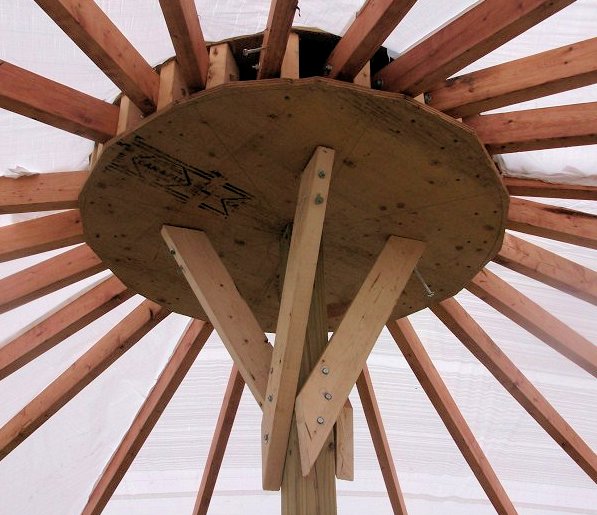
Another precaution was to reinforce the support beam under the yurt’s roof ring by adding four (4) additional pieces of lumber. Since the ground was not completely level, the wheel tended to lean to one side. These 4 pieces help stabilize the ring and therefore the entire structure.
Covering the yurt
Since this yurt was mainly to attract attention from the road and display machines inside it, the covering did not need to be high quality; it just required to look good from the road.
There were white heavy-duty tarps available and we cut them up in sections to put over the rafters. Each section would be stapled at each rafter.
A funny thing happened during the freak rain storm
There were jokes going around that the yurt would fly away if ever a storm came through town. Well, 10 minutes after stapling in the last section of the roof a massive and punishing rain storm appeared with lightning, thunder, heavy rain and very powerful winds.

At first I went into the yurt to see where there were weaknesses. The spacers around the yurt each had a 40-pound bag of gravel. That seemed to be the best part; the worst one was seeing how that center supporting beam remained 4 inches above ground during the storm.
In the end, the yurt did move somewhat but it stayed up. Had all the lattice wall slat been screwed into the wall studs, and some weight attached to the center beam, it would have withstood even more powerful storms. Still, it won’t hurt to add tension cords around the yurt to compensate for the strong winds in the region.

